Good Luck…


The new timeplan is so far a success- I’ve managed to cross a week off the list, and a little bit of next week too!


This week however has started off a little slow, but I’ve managed to get a lot done. This morning I played through the game from level one to level three for the first time to check that everything worked well in succession, and for the most part it did! One random little bug started to emerge towards the end of the playthrough however, as the framerate started dropping rapidly whenever I passed by a doorway to a building or cave. I managed to solve the problem by tweaking the “teleport” code slightly (I literally moved one line and removed a pair of curly brackets and everything was fine!) In the panic I read through this article on the Game Maker Community forums, which talks about optimizing game performance through various settings and commands, so the rest of the morning was spent tweaking little bits for best optimisation. One of the most vital lines of code I’ve added is this:


These few lines deactivate EVERYTHING that is outside the current view, and activates it when in sight. I had to activate the top corner of each room in the last line of code, as this is where all my control objects are kept including light functions, menu functions, sound functions, HUD functions… By reducing the amount of active instances, the game runs at a very steady 60 FPS constantly, occasionally dropping to about 58. Hopefully this means that even on lower spec machines the game will be very playable.

After this was over, I spent a little time tidying up little bits that I’ve previously started. I’ve replaced my old pink room transition object with an open door sprite, which is drawn onto the screen when the player reaches the right amount of flowers. The door only opens slightly, which is great if you’re nearby when you collect that final flower because it actually looks a bit like the door is opening.


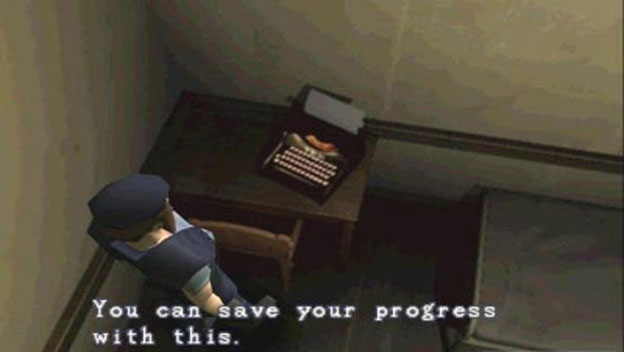
I’ve fixed my save point Furin so that it looks like it is attached by a nail, not just floating next to a rock! I’ve made sure that all my save points are actually within reach of the player, which seems like an obvious task but this really is something I had previously overlooked.


As for the actual saving problems I was having, I’m not sure there’s such a big problem there after all. The problems may be related to the fact that the saves are made in the middle of making a lot of changes to the levels. I’ve also changed the save file to a .ini instead of a .sav, which for some reason saves more of the game information and is the only file extension which will reload sound effects. So until I’ve finished everything in the game, I’m not going to change the way the game saves or loads.

I’ve started to work on the final level of the game, firstly by changing the colours in the tileset and secondly by getting creative with my old tiles again. Up until now, my buildings have been very samey, so I’ve been experimenting with new ways that I can use my existing tiles (again!) I also managed to make a mini bridge from a section of my old bridge tiles.


There are now blossoms to collect in this level, so the HUD displays a total of all the flowers the player has collected throughout the game out of a possible 90. This was simply a case of adding the values of global.itemList1, global.itemList2 and global.itemList3.

Now that I know roughly what I’m going for with the design, I’ll do most of the rest on paper. This building will branch off into rooms, as opposed to having a large open outdoor space to explore. In one of the rooms there will be a door which only opens with an accumulative total of blossoms, so although the player may have made it this far they may still have to backtrack and do some more collecting! The end of the game is through this door, although I’m going to have to go back to the GDD and have a think because I don’t actually know how the game ends yet…

Save/Load Functions

The tricky part of implementing a save/load system is the painful process of working out what Game Maker will and won’t do using its default game_save(); and game_load(); functions.

Based on my original inventory menu, I’ve created two new menus in a similar style which represent the save menu, which is brought up by pressing the menu button at a save point, and a pause menu, which is brought up by pressing return/start and can be used to load up a saved game.

Save Menu


Pause Menu


To activate these menus, I’ve used a similar set of code to that used to activate the inventory menu. In the case of the save menu, when the player is in contact with a save point object and presses “S”, all objects are deactivated and a temporary overlay is created from a still image of the background. The object obj_save is then created, which draws the save menu onto the screen.


I’ve included the object obj_save in my list of instances that are created when the game is started. When initiated by the save point object, it changes the state global.save from 0 (false) to 1 (true), and draws the menu sprite onto the screen as well as the highlight sprite which changes position when the left and right keys are pressed. The options in the save menu are the same size and shape as the menu slots in the inventory menu, so I was able to use the same highlight sprite for this menu. Like the inventory menu, each “slot” (s) is given a value, in this case because there are only two options the values are 0 and 1. If s is 0 when the X button is pressed, the game is saved. If s is 1 when the X button is pressed, the game returns- pauseon and global.save are both reset to 0. Game Maker uses a simple one line of code to save games: game_save(“example.sav”);. However, there are many things that aren’t included in this save file. I already discovered a while ago that temporary datastructures, such as the item lists I use to hold information about collected blossoms, are not saved in save files. To save this information, I’ve had to save each list as a separate text file, so the save code has become quite extensive!


The game here is saved as a file called hanamisav.sav in a designated folder called “save”. I made this empty folder to test if this save function would work, and sure enough the files appeared in the folder straight away.


As a symbol of the game being saved, I’ve made a floppy disc icon which appears at the top of the screen whenever the player opts to save or the game is autosaved. The floppy disc seems to be the universal symbol for “save”, whether used as an icon in software such as Game Maker or as a save point in games such as Cave Story!


On my floppy disc icon, I’ve included the kanji I discovered before for “to save”. This is supposed to look like it written on the standard lined label that you used to get with blank floppies. Like the sushi icon which appears temporarily at the top of the screen, this icon remains for about three seconds before disappearing.


I’ve assigned the pause menu to the return key or start button on the SNES controller. Pressing either of these buttons will do exactly the save as all pause functions I’ve implemented so far, but will draw the pause menu sprite onto the screen. The options are actual strings of text which are drawn over the top of this sprite, according to the array I’ve set up in the object obj_pause.


This list of text acts differently to the slots I’ve used in my previous two menus, so I wasn’t able to use the same highlight sprite to hover over options in this case. Instead, I’ve used two different colours to show whether the text is highlighted or not. The lighter colour shows the option currently selected.


At the moment, both the “continue” and “main menu” options will simply resume the game, as I don’t have anything that acts as a main menu yet! I may later change this option to “quit”, and simply make it close the game. To load the game, I’ve had to make sure that all five files are loaded and properly restored. I’ve written out the code in the opposite way to the save code, so that each text file is loaded then applied to one of my global.itemLists. As for the rest of the game’s properties, I’ve so far relied on the default game_load(“save/hanamisav.sav”); function to restore everything else.

Loading the game shows some….interesting results. Each of the text files are actually restored properly, this was the part that I was mainly worried about! Everything in the GUI returns to exactly how you left it, including level progress, health and collected sushi. However, I’ve noticed a couple of things that the aren’t restored properly due to faults in the default Game Maker save file. The sounds aren’t loaded, possibly because the SuperSound.dll doesn’t exist in the “Save” folder, and weirdly enough the mushroom’s particle system isn’t restored. Another MAJOR issue is that 8 times out of 10, the game will crash after you’ve taken a few steps from the restore point. Of the remaining 2 times out of 10, 1 of those will produce an error message stating that a non-existing background cannot be deleted, which is probably due to a fault in my code for the temporary pause background. Because of these problems, I’m going to look at alternative ways of saving that don’t use the default save functions. I may also make slight tweaks to the menu interfaces, but not too much.

Remember Save Points?

What was going to be a relaxed weekend of casual doodling has somehow turned into a few brain-mangling hours of discovering everything that’s wrong with Game Maker’s built in save and load functions. I figured I still haven’t sketched all the characters I’ve planned in the GDD- this is something I want to do, even if some of them don’t make it into the game. The next semi-important character I’d planned was a pervy guy with a camera who will “take a snapshot” of the player and save the game (remember the camera guy in Rayman? A bit like that… I can’t find a decent screenshot online, but it looks like they’ve done the same thing in Rayman Origins which I still haven’t managed to play yet)


I was inspired to design this guy after reading about perverted Japanese guys who like to get close to women on crowded subways etc, and somehow thought “that would make a good save/load system!” Well, I drew a little design of the guy, camera at the ready, and just wasn’t sure if he was right for the tone of the game…


I even got round to making a pixel version, which I might use later on for a less important NPC if I’m stuck for time. It’s difficult to make someone look creepy in such a small space, and more difficult to make a camera that actually looks like a camera, so all round this wasn’t a huge success.


So, back to the drawing board. It seems like these days you can save most games whenever you like, which is certainly convenient. This was pretty much unheard of until the past 10 years or so- up until then you would have to wait until you reached a designated “save point” if you wanted to save your game, and these were elusive and unpredictable little objects a lot of the time. In the harshest scenarios, such as the original Resident Evil, you had to collect items in order to use a save point, so the amount of saves were extremely limited.


My plan for Hanami is to include one save point in each level, which can be used infinitely as long as the player reaches it! The game will also autosave at the beginning of each level, so if the character dies they will either return to the last save point, or the beginning of the level- whichever occurred most recently. Instead of using a character, I tried thinking about more Japanese symbolism that could be used as an emblem of a save point. You can see my ideas in the sketch above, as I’m running out of sketch book pages and I’m trying to conserve paper :S

My first idea was to use a Hanami Dango, which is a special type of mochi on a stick eaten at Hanami. This was actually a coincidental discovery for me, as they popped up in the film Tekken: Blood Vengeance which I watched recently.


I considered placing a Hanami Dango stick on a sort of pedestal to create a sort of Hanami Save Alter, and this is where I got with that. The kanji means “to save”.


I didn’t quite finish this design, as I felt it didn’t really capture what I hoped it would. I don’t like wasting cool little things like this though, so there are plenty of food outlets throughout the world of Hanami that the Dango will probably make their way into! As I’m still trying to capture an overall image of Japan, I tried to find a nice little artefact to use rather than trying to keep within the realms of the Japanese spring time. After all, a lot of traditional save points were random emblems. I mean, what was the save point from FF7 supposed to be??


I had a look on the internet to see if there was anything seriously Japanese that I had missed out, and I found this article about must-have Japanese souvenirs! It includes a lot of imagery that I have already included in the game in some way, such as Maneki Neko, Hand fans, Umbrellas (Wagasa), Lanterns, kokeshi dolls, koinobori… On this list, I rediscovered Furin bells. I thought these would be a nice point at which a player can save their progress, as their inevitably interactive and look nice too 🙂 The bell consists of a domed glass case and a single glass chime running on a rope through the centre. A tag is placed on the end, where little bits can be written (I was considering trying to get a bit of kanji onto this, but haven’t managed to in such a small space yet!) I might yet put a design onto the glass, but for now I’ve settled for a simple Furin bell design:


On contact with this new object, the player can open up a new menu which asks whether or not they would like to save their game. I originally envisaged the object hanging from a rock outcrop or something like this, although I realised from a bit of play-testing that this object is too high up ¬_¬

Technical Updates

Until now, each level has only existed on its own, completely unlinked from any of the other levels I’ve currently created. This is mainly because the pink square that I’ve been using as my warp between rooms can only be used if the destination is in the same coordinates as the square on both sides. This is useful for entering and leaving buildings and caves, which I’ve made to line up with the main level structure -all buildings and caves are the same dimensions inside and out. However, in the transition between level one and two for example, the player jumps from an X coordinate of 2992 to an X coordinate of 688, so I’ve had to create a new item specially designed for transition between levels. The new icon uses all my artistic abilities and has formed this go faster arrow shape to differentiate itself from the standard warp square.


On contact with this object, I’ve set up variables who’s values are defined in the individual instances on the map. In the collision event I have:

room_goto(rm); //goto “rm”
obj_player.x = X; //the player object’s new X coordinate
obj_player.y = Y; //the player object’s new Y coordinate

Then, in the individual instance these figures are defined as something like:

rm = rm_2_1; //Level 2 part 1 (main)
X = 688; //new X position
Y = 178; //new Y position

This allows transition between any level regardless of score, so I’ve had to make only allow transition if a sufficient amount of flowers have been collected. Before now, I’ve used one datastructure list to hold information about the collected blossoms, but as this figure changes depending on the level the player is currently on, I thought the best course of action would be to create a unique datastructure for each level. In my GameInit script which runs at the beginning of the game, I now create four lists instead of one:


The first list controls collected sushi boxes. This was previously the same list used to hold information about collected blossoms, but as I’ve had to change everywhere in my code that uses one of the new lists it was simpler to leave this list there. The other three lists correlate to the three levels. I’ve also had to set up three different “gamescore” variables, which display the amount of flowers collected in the HUD and in the inventory. Because these are persistent global variables, each value will remain even if the figure doesn’t show. So when the player leaves and returns to level one for example, the figure will return to the previous global.gamescore1 figure.


The value of each is increased by one whenever a flower is collected, but now the room that the player is in affects which gamescore value is increased. I don’t know if this is the simplest method of achieving this, but I’ve set up the system in this lengthy but fool-proof way:


The || symbol represents the word or, so the top line of the code states that the following actions only apply if the player is in room 1_1 or room 1_2 or room 1_3 etc. The corresponding gamescore is increased by 1, the item collection sound is played and the information added to the appropriate datastructure list. The instance (the individual flower item) is then destroyed, as it has been collected and shouldn’t appear again! I haven’t had to create three different HUD objects as the player’s health remains constant throughout the entirety of the game, instead I’ve simply had to state which gamescore should be drawn depending on the current level. It’s a very similar process to before:


In order to determine whether a level transition will work depending on score, I’ve simply stated that gamescore1 must be over 9, gamescore2 must be over 14 and gamescore3 must be over 19. If not, the player won’t be able to progress to the next stage.


At the moment, the open transition is marked by my beautiful pink square sprite, so next on my to-do list is create an open door sprite to replace this with! You can now play all levels from beginning to end (as far as I’ve made, anyway.)

Oh you, Ladder Cave…

All programming/development has literally been on hold this week while I fill in graphics, so it feels like I don’t have much to say recently. Level 3 is now looking pretty finished, so I’ll include some video footage in my next Devlog Video of me running around it! I didn’t have to make too much more for my latest blue level, except for a new water tile for the onsen (which may be temporary for now), and a new structure to mark where the onsen are.


The tile in the middle of the structure can be repeated to increase the width of the structure, as most of the onsen are different shapes and sizes. I originally wanted the middle to be peaked, but this raised serious difficulties when trying to extend the structure width-ways! I’ve placed the new tiles into the level, including the finished second hald of the level, which was looking very bare before.


The last part of the level to design was the level’s only cave, which stands alone with four entrance ways as opposed to having two cave sections with fewer entrances. You can see how each of these entrances align in the centre of the map in the image below, obviously in the room editor the pink squares represent warp points between rooms.


As with all cave sections, I’ve based the shape of the inside of the caves on the outer landscape. This cave has ended up with a long vertical spine with a horizontal part that crosses over it near the top. Because of the cave’s long shape, I decided to see what I could accomplish here using ladders, which can only be used for moving up and down. I worked out that the Hanging Adversary can be used as a very effective obstacle while the player is moving vertically, by placing it to one side of the ladder like this:

The player can only wait until a timed move past the plant, because a left or right movement would result in the player falling. So, with this in mind I designed (most of!) the cave to revolve around climbing as many ladders as possible.


I got a little stuck in the bottom left-hand corner, so I waited until I could test the effectiveness of the rest of the area to place something in here. In the end, this area ended up being a little maze section with no real obstacles to overcome. Because this is the last cave of the game, I’ve placed as many Hanging Adversary obstacles as possible without the stages becoming impossible/ridiculous. This cave scares me a little, but I’m glad I have the upper hand of knowing where everything is :S I recorded this video to show the evasion of each obstacle in the cave, and I somehow managed to not take any damage until right at the end! The hardest placement of obstacles here is where there is a sharp left or right turn at the top of a ladder, or where there are many obstacles together (which is where I failed!)

Thinking With Platforms

I’ve changed my tactics slightly while designing this level, so that I can essentially design and test simultaneously. I’m trying to keep level layouts varied and involve new challenges for the player with each level, but it’s been difficult to judge the success of drastic changes on paper. So my new process is: draw, test, redraw, test, create!

The kanji for “blue” which I’ve based the level 3 layout on is: 青, which gives the opportunity for a lot of long horizontal platforms. Unfortunately, I ended up with a lot of these after creating the level based on the kanji for “orange”: 橙 (it doesn’t look like it has many horizontal lines but I ended up putting a lot of emphasis on the small lower section on the right hand side!) The long, straight parts of the previous level are pretty much the most boring game sections I’ve made so far, so I really wanted to avoid them this time round.


I started off with this level mock-up, which like all of my other level designs has ended up looking nothing like the original kanji! The blue patches are “onsen” hot springs, which are the unique little features in this level. In Japan, accommodation and bathing facilities are often placed near onsen, so I’ve placed the buildings near the hot springs. I’ve also tried to avoid placing buildings in the level’s four corners, which seems to have inevitably happened in levels 1 and 2. This level is unique however beacause I’ve only placed one cave, which is larger than all previous cave levels and connects more parts of the level. It’s difficult to see in the mock-up, but I’ve placed grey squares where the entrances and exits are located. My main concern with the mock-up is that there are still a lot of long, straight platforms, but at this point I printed the design to work out the rest on paper.


When I printed the layout this time I didn’t join the two pieces of A4 paper together, so I’ve ended up with two halves which were really easy to scan! You can see the detail in this design much better than in my previous photos. The level starts in the bottom left-hand corner, where the warp door object is. I’ve got a few more tiles to create for this level, mainly where the onsen are. The structures around the onsen are based on this image from Onsen No Tengoku (Onsen of Heaven) in Hakone. The travel guide describes the site as “slightly run-down but remains atmospheric”, which I though fit in perfectly with my rural setting.


In this design, I’ve added a section to one of the long horizontal platforms to break up some of the length and add more rises and falls. The idea was to place obstacles where there are large gaps between the platforms, however I had to change this idea again when it came to testing because some of the scaling didn’t work well- this is main disadvantage to designing on paper with no grid! After drawing up the design, I roughed out the platforms in Game Maker to test the changes and jump distances between platforms etc. I’ve spaced out a lot of level more than usual to make the path less decipherable, and it seems to have worked pretty well. I’ve since added a lot more detail to this first half of the level, using my new blue-coloured tileset! You can see the platforms in the room editor in this screenshot:


The solution to the problems with lots of straight horizontal sections seems to be the obvious answer. I’ve made the lengthy run seem less “lengthy” by adding jumps that create thinking points for tactical evasion, as you can see here in a section which original consisted of one long horizontal platform. When making a platformer, think with platforms.


The second half of the level is still incomplete, I’ve simply added in the basics of the platforms for testing. I drew up the rest of the level today, so this should be filled in soon. There are still some platform changes to be made.


Ao Iro Mood Board

Aoi things from Japan:)


I feel so blue now!

Good Morning, Week Twelve!

I recently bought a SNES controller to USB adaptor so I that I can plug my old gamepad into my laptop, and as an added bonus I’ve been setting up the buttons to correspond to keyboard keys so that it can be used to play Hanami. Game Maker has a limited range of functions for “joystick” input, which took a while to figure out. Each button is given a number, and I used a process of trial and error to work out which button responded to which figure! I made a note of all the relevant buttons so that I can make the best of controller input in the future:

Button 1: B
Button 2: A
Button 3: Y
Button 4: X

Button 5: L
Button 6: R

Button 7: SELECT
Button 8: START


The direction buttons (D-pad) are a given! I downloaded a script from the Game Maker Community forums which is fully customisable to allow each button to represent a keyboard key (I could have done this myself but this way was just easier and saved a lot of repetitive typing!) So far, I only have to accommodative for a short list of functions, but I’m trying to think of ways to use more of the controllers buttons (only if this doesn’t make things overly complicated!)

X (execute): Button 2
Z (jump/back): Button 1 & Button 3
S (Inventory): Button 4
RETURN (Pause): Button 8


I’ve created a new object called obj_joystick_control which simply sets each controller button to “false” until it is pressed, in which case the script operates the relevant function, so I haven’t had to go back and find everywhere that I’ve coded for keyboard input and change it! Obviously, you can still use the keyboard as I’m guessing not everyone has a SNES controller and USB adaptor lying around. For me, I find there are few PC games that I would rather play with a mouse/keyboard than a gamepad, and I think all good PC games should support controller input!

Back to more important things, yes it’s now week twelve of the EMP and the beginning of the Easter holidays. According to the timeplan I wrote 12 weeks ago, I should be “thinking of ways to resolve problems with various downloaded scripts and extensions” this week, which I’ve actually ended up doing as I’ve gone a long and as a result, haven’t had too many problems to resolve. My “problems” so far have mainly been visually, as I’ve included a range of useful extensions and scripts that execute functions far better than I could have done if I’d tried from scratch. As well as this, I’ve allowed this week for feedback from videos- so visual feedback rather than gameplay feedback so that I can continue to refine the game’s graphics.

As visuals are my main emphasis right now, I’ve decided to tweak my timeplan slightly from now until the end of the project. It wasn’t easy to predict exactly what I would have by this point when I wrote my original timeplan (which is why it’s ended up being a little vague!) Last week, I had planned to start to work on physical attributes of the game like casing and manuals, but ended up concentrating on getting level 2 down, which went really well and I managed to get a lot done in one week! So for now, I’m going to carry on designing and creating levels, and concentrate on other areas one at a time. I’ve tried to prioritise a list of things to do in terms of how important they are to the finished game: level layout design/creation, object/content placement, code for interactions, GUI/menu systems, sound refinement, physical design. Based on this, I’ve here’s my new timeplan:

Steep Difficulty Curves

If the difficulty is poorly tuned, the game can become either impossible or boring.

~Pascal Luban

Today I’ve been designing and building the cave sections of level two, which I’m planning on having two of in each stage. In level one, the caves were the level’s “mini dungeons” and contained many more strategically placed obstacles than the rest of the level, which in turn made the caves more difficult than other areas. I made sure that the level could be finished without actually having to enter a cave, although if a player wishes to collect all thirty blossoms in the level then they would have to! In level two I’ve made sure that the caves must be entered, by placing the end of the level at the exit of one of the caves.

The player finds the first cave fairly close to the beginning of the level, if they choose to move downwards where the path forks. You enter the cave here:


And exit the cave to here, which is a dead end unless the player has collected the 15 necessary blossoms:


The aim of the design is to be more difficult than the rest of level two, but also more difficult than the caves in level one. This creates a difficulty “curve” which the player must adapt to, although more game developers seem to agree that there is no actual curve in game difficulty most of the time! In the blog I’ve pulled the quote from above, one example of a difficulty curve is described like a staircase, rising at intervals but lying flat for a while afterwards. Mine consists more of peaks and troughs, as difficulty is increased by a higher level of obstacles in cave areas but is lowered again when outside. Because Hanami is likely to only have three main playable levels (and a fourth ender level), I’ve aimed to increase the difficulty fairly rapidly, so that the maximum level of difficulty is reached by the end of the game.


In this design, I’ve tried to include platforms specially designed to challenge the player. At the top of the cave, I’ve added sections where the player must time jumps between platform heights between the swings of the spike plant above them. This is based on a part of a level one cave which allowed much more room. This time, I’ve gradually decreased the available space each time the player encounters a swinging spike plant. Another little challenge I’ve included is placing blossoms between two mushrooms, so that the player must accurately land jumps in order to not get hurt by the obstacles on either side of them. Unlike my some of my previous cave designs, I found myself re-scaling and moving parts of this design around quite a lot when it came to place it into the level! This is its finished form in the level editor (the red blocks represent solid platforms)


In this next screenshot, you can see the increased difficulty in acquiring blossoms throughout the first part of the cave:


Throughout this cave the player must be constantly more aware of their surroundings and the timing of their moves. I’ve tried to keep a similar level of difficulty in the second cave of the level, which is an optional cave which doesn’t lead to anywhere else in the level. It is accessed by hopping across a few platforms before reaching the Koinobori Cafe in the levels south-east corner. As you can see, this part of the level still needs a fair amount of work doing to it!

I enjoyed designing this cave as it occupies a wider space than my previous caves which tend to travel vertically. Part of the challenge of this design is that the layout is almost symmetrical, apart from a few blockages caused by mushroom enemies which halt the play from progressing on one side or the other (unless they choose to take damage).


I’ve included some of the same sorts of challenges throughout this design, although I’ve increased the difficulty of this part slightly by creating a cave-bed that cannot be touched if the player falls/misjudges a jump etc. I considered creating a lake of poisonous liquid or some other such over-used game cliche, but for now at least I’ve ended up using my Hello Mushroom enemy to fill the bottom of the cave (as a result I’ve nicknamed this the mushroom cave. I think it’s pretty.) I haven’t placed any blossoms in this cave yet, but I’ve planned for one to go at the bottom of the cave on the left hand side. On the other side, the player is simply met with yet more mushrooms!


That's a lot of mushrooms.


This is definitely the hardest part of the game so far, possibly even the hardest I will make. The difficulty is due to a mix of difficult jumps, awkwardly placed obstacles and the inability to fall safely!

Changes to the Background

One thing that’s been bugging me for a while is the overpoweringly plain background, which so far has been a challenge to improve. Because Game Maker doesn’t support large images, the background must be repeated in some way and can’t consist of one specially designed image. So far I’ve created one repeating image that repeats itself across the X axis at the top of the screen, but the image cannot be repeated vertically, so for the majority of the space I’ve ended up with a solid block colour filling most of the screen.


I’ve tried taking inspiration from existing games, although a lot of the most successful backgrounds (in my opinion) are either made of large complex images specially created to fit the foreground, or they’re smaller images that can have a “proper edge” because there is no moving camera change the background view. Above is an example from Braid, which consists of a huge background which pans the extent of the room.


A Boy and his Blob has some really great foresty parallax scrolling backgrounds, and to some extent some vertical camera movement. Here the trees have been scaled to create a sense of depth throughout the background, and brighter colours have been used closer towards the foreground to reduce the emphasis of distant background features. This is something that I could really consider incorporating. A while ago I posted about some trees that I designed to be part of background imagery, but I have since removed these because I felt the design was too inconsistent with the foreground. I felt inspired to redesign these recently after watching Tekken: Blood Vengeance (of all things :S) and seeing a similar style tree in the Japanese landscapes of the film.


I realised that in order to make believable, aesthetically successful trees I would have to pad my old design out slightly, and try to represent the trees textures much better, especially leaf formations. I mocked up this new design to check how well it fit into the level design, judging by its size and shape:


Here is the finished design, with all details added:


The colours have also been dimmed slightly, because I noticed that the old design cluttered the foreground a lot more than it should have done. I only have one tree made up with this new design, but it doesn’t seem to get too repetitive when placed throughout the game. I’ve placed the design into level one for now, although I’m considering only using Cherry trees in this level and saving the Bonsai style trees for level three.


I haven’t got round to adding any “depth” to the background imagery yet, but you can see here that I’ve been playing around with difference colour combinations etc. I’ve finally got round to brightening the ambient colour overlay which activates the lights, so the level feels a lot less dark now! The new colour is “grey38” from this list of hex code colours. The colour of the sky here may or may not stay, but this is intended to be level specific, so in level two the sky will be an orangey colour.

I’ve also been working on an alternative to trees in level two to add a little more variation to the level. Instead of a thick layer of trees, I’ve been trying out a thin layer of bamboo in a similar colour scheme to the new tree designs.


These seem to look much better spaced out than bunched together, as you can see from these screenshots:


In this last image, you can see that I’ve added the same silhouette background, ambient overlay and sky colour to create a much more finished looking background, which is consistent with other levels.